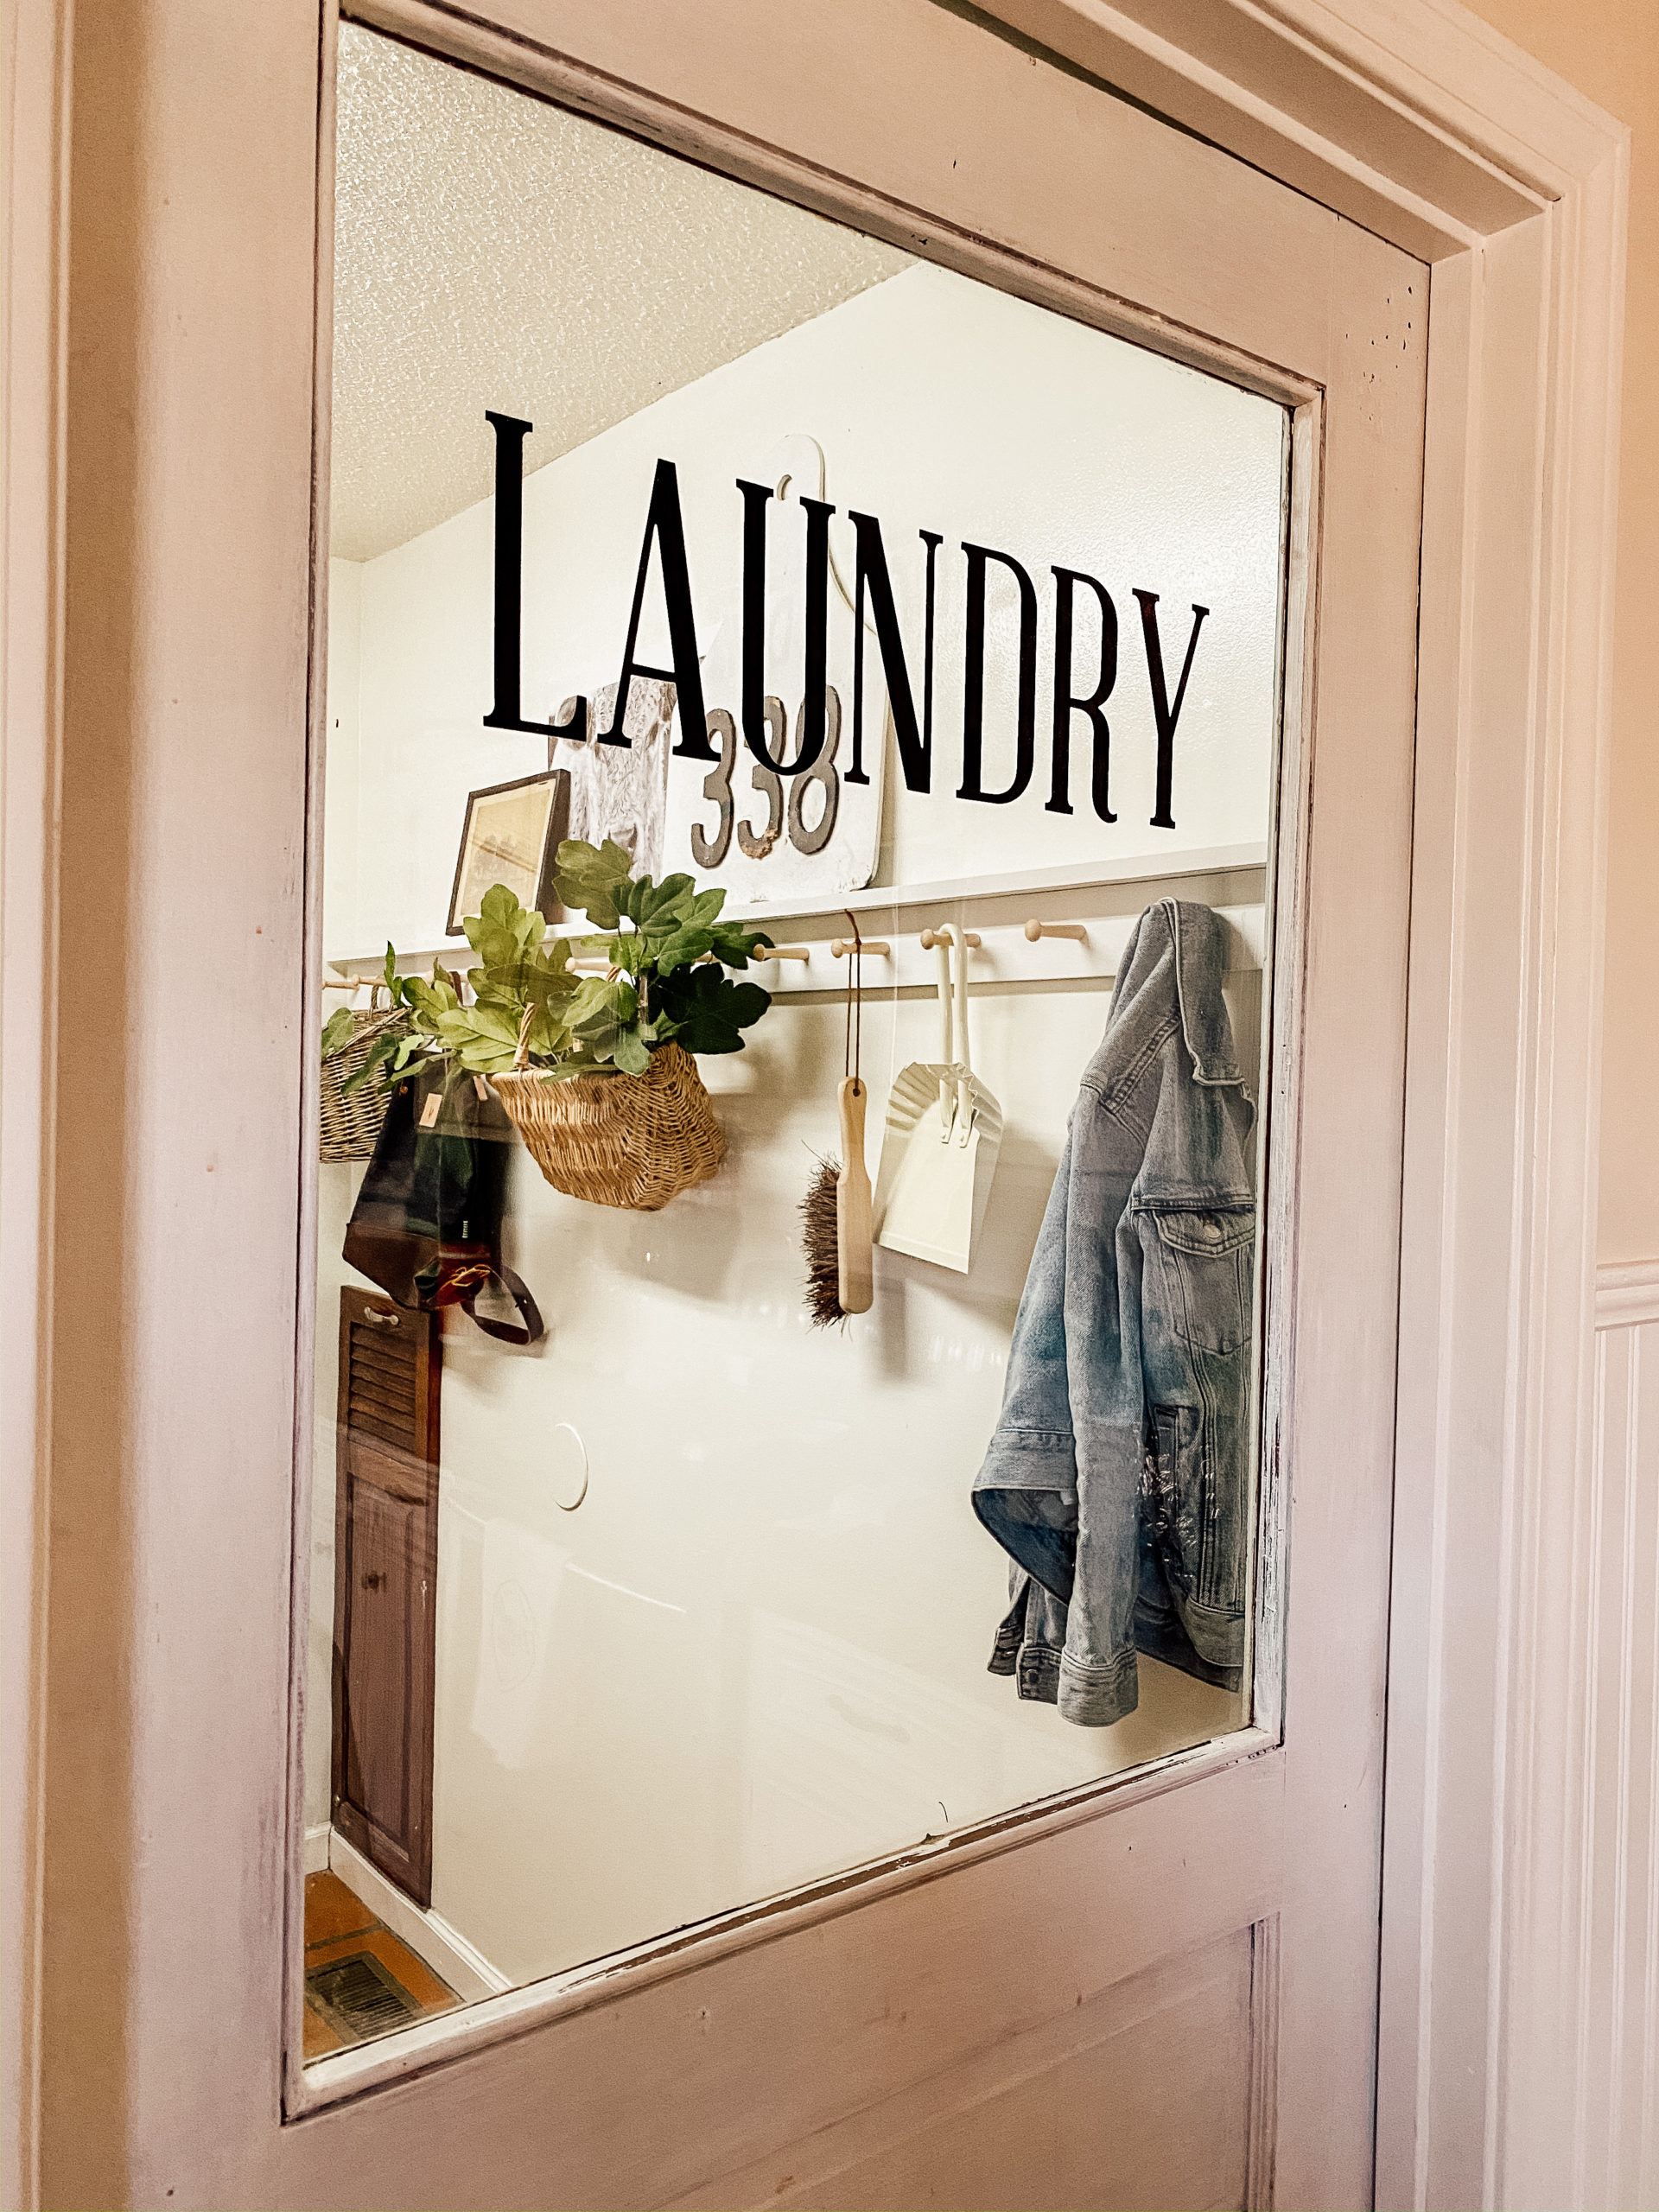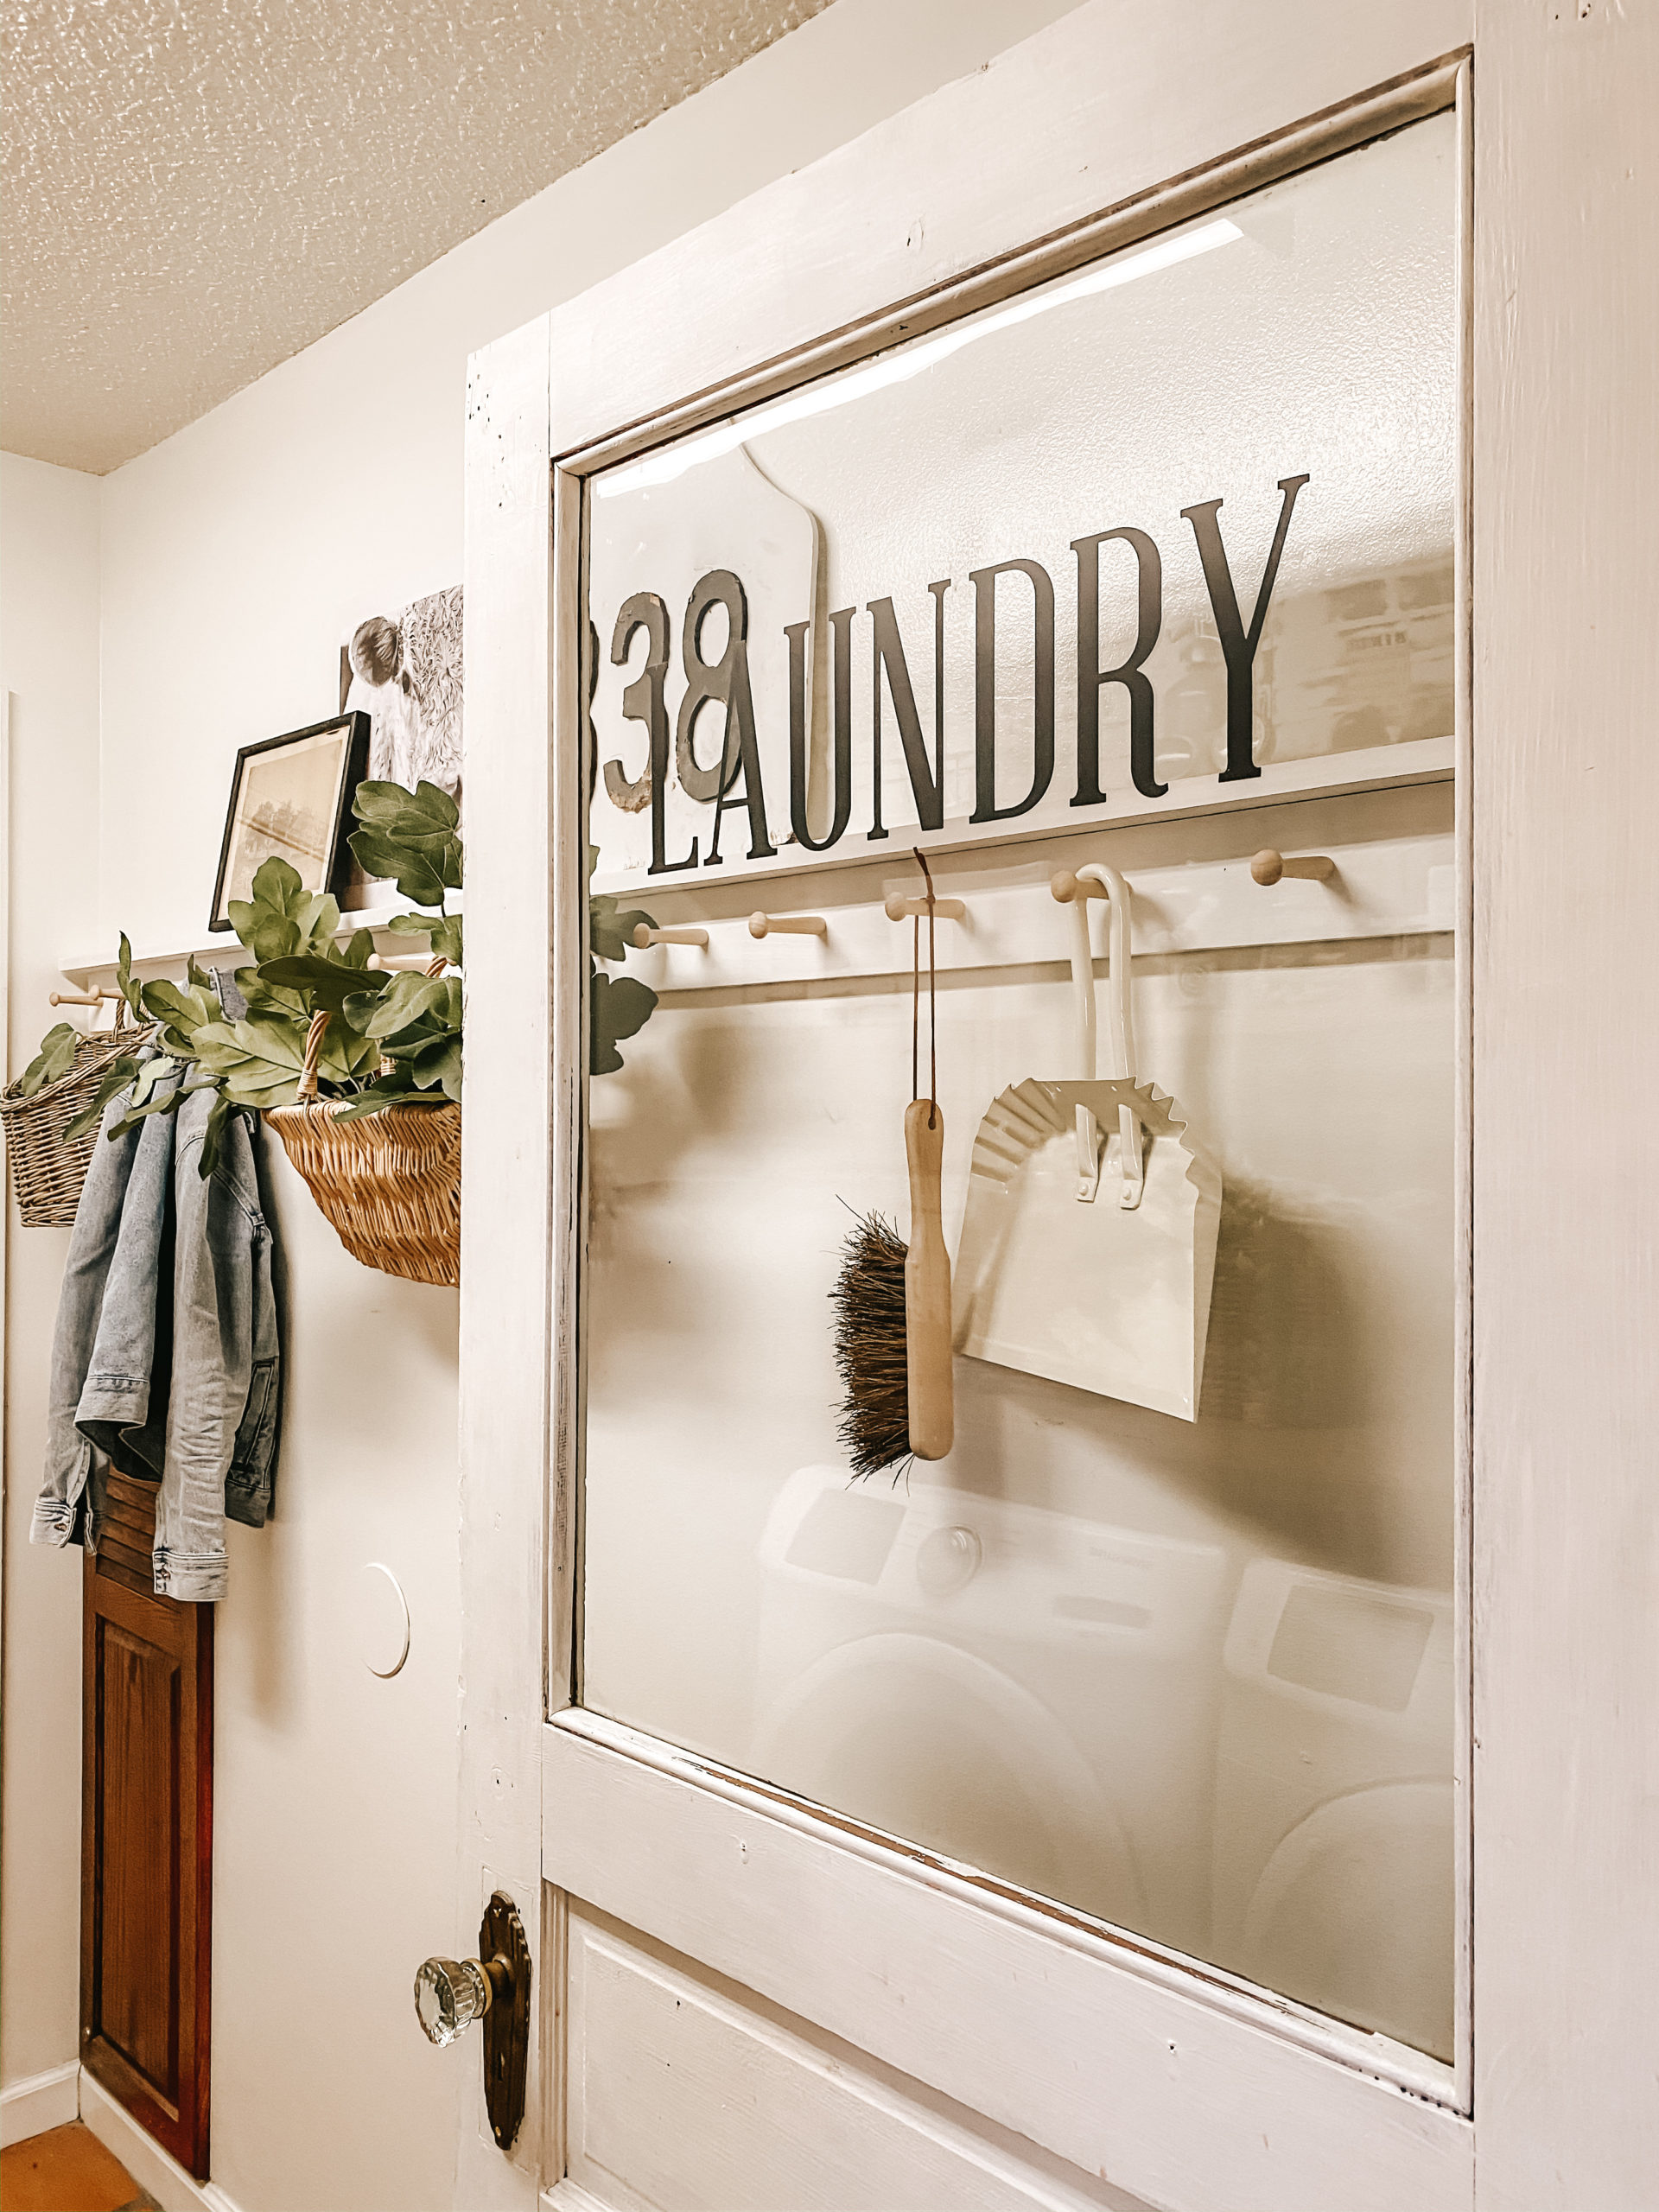
Simple and easy DIY’s is what I promised to bring to the blog this year. I wanted to create DIY’s that everyone can do no matter how experienced or inexperienced you are with projects. As many of you know, one side of the laundry room has been completed for quite some time now. The other side has been a hot mess express, I could never make up my mind on what I wanted to be on that wall. Never in a million years would I have expected to put a shaker peg rack.
This thought was inspired by my fellow blogger friends and the little shaker peg rack that I recently put in the kitchen. There are many different ways of creating reg racks and you can always add your own twist to these to amen them your own. I knew that I wanted to have a little shelf on the top of mine but nothing that was going to stick out too far since the doors open on that side of the room. Once I decided on that I then was debating whether or not I wanted the entire rack white or white with natural wood tone shaker pegs. Recently, peg shaker racks have been making a comeback and as much as I love the all white, I wanted to add a flare to it. I went with the two tone look and I am so excited that I did.
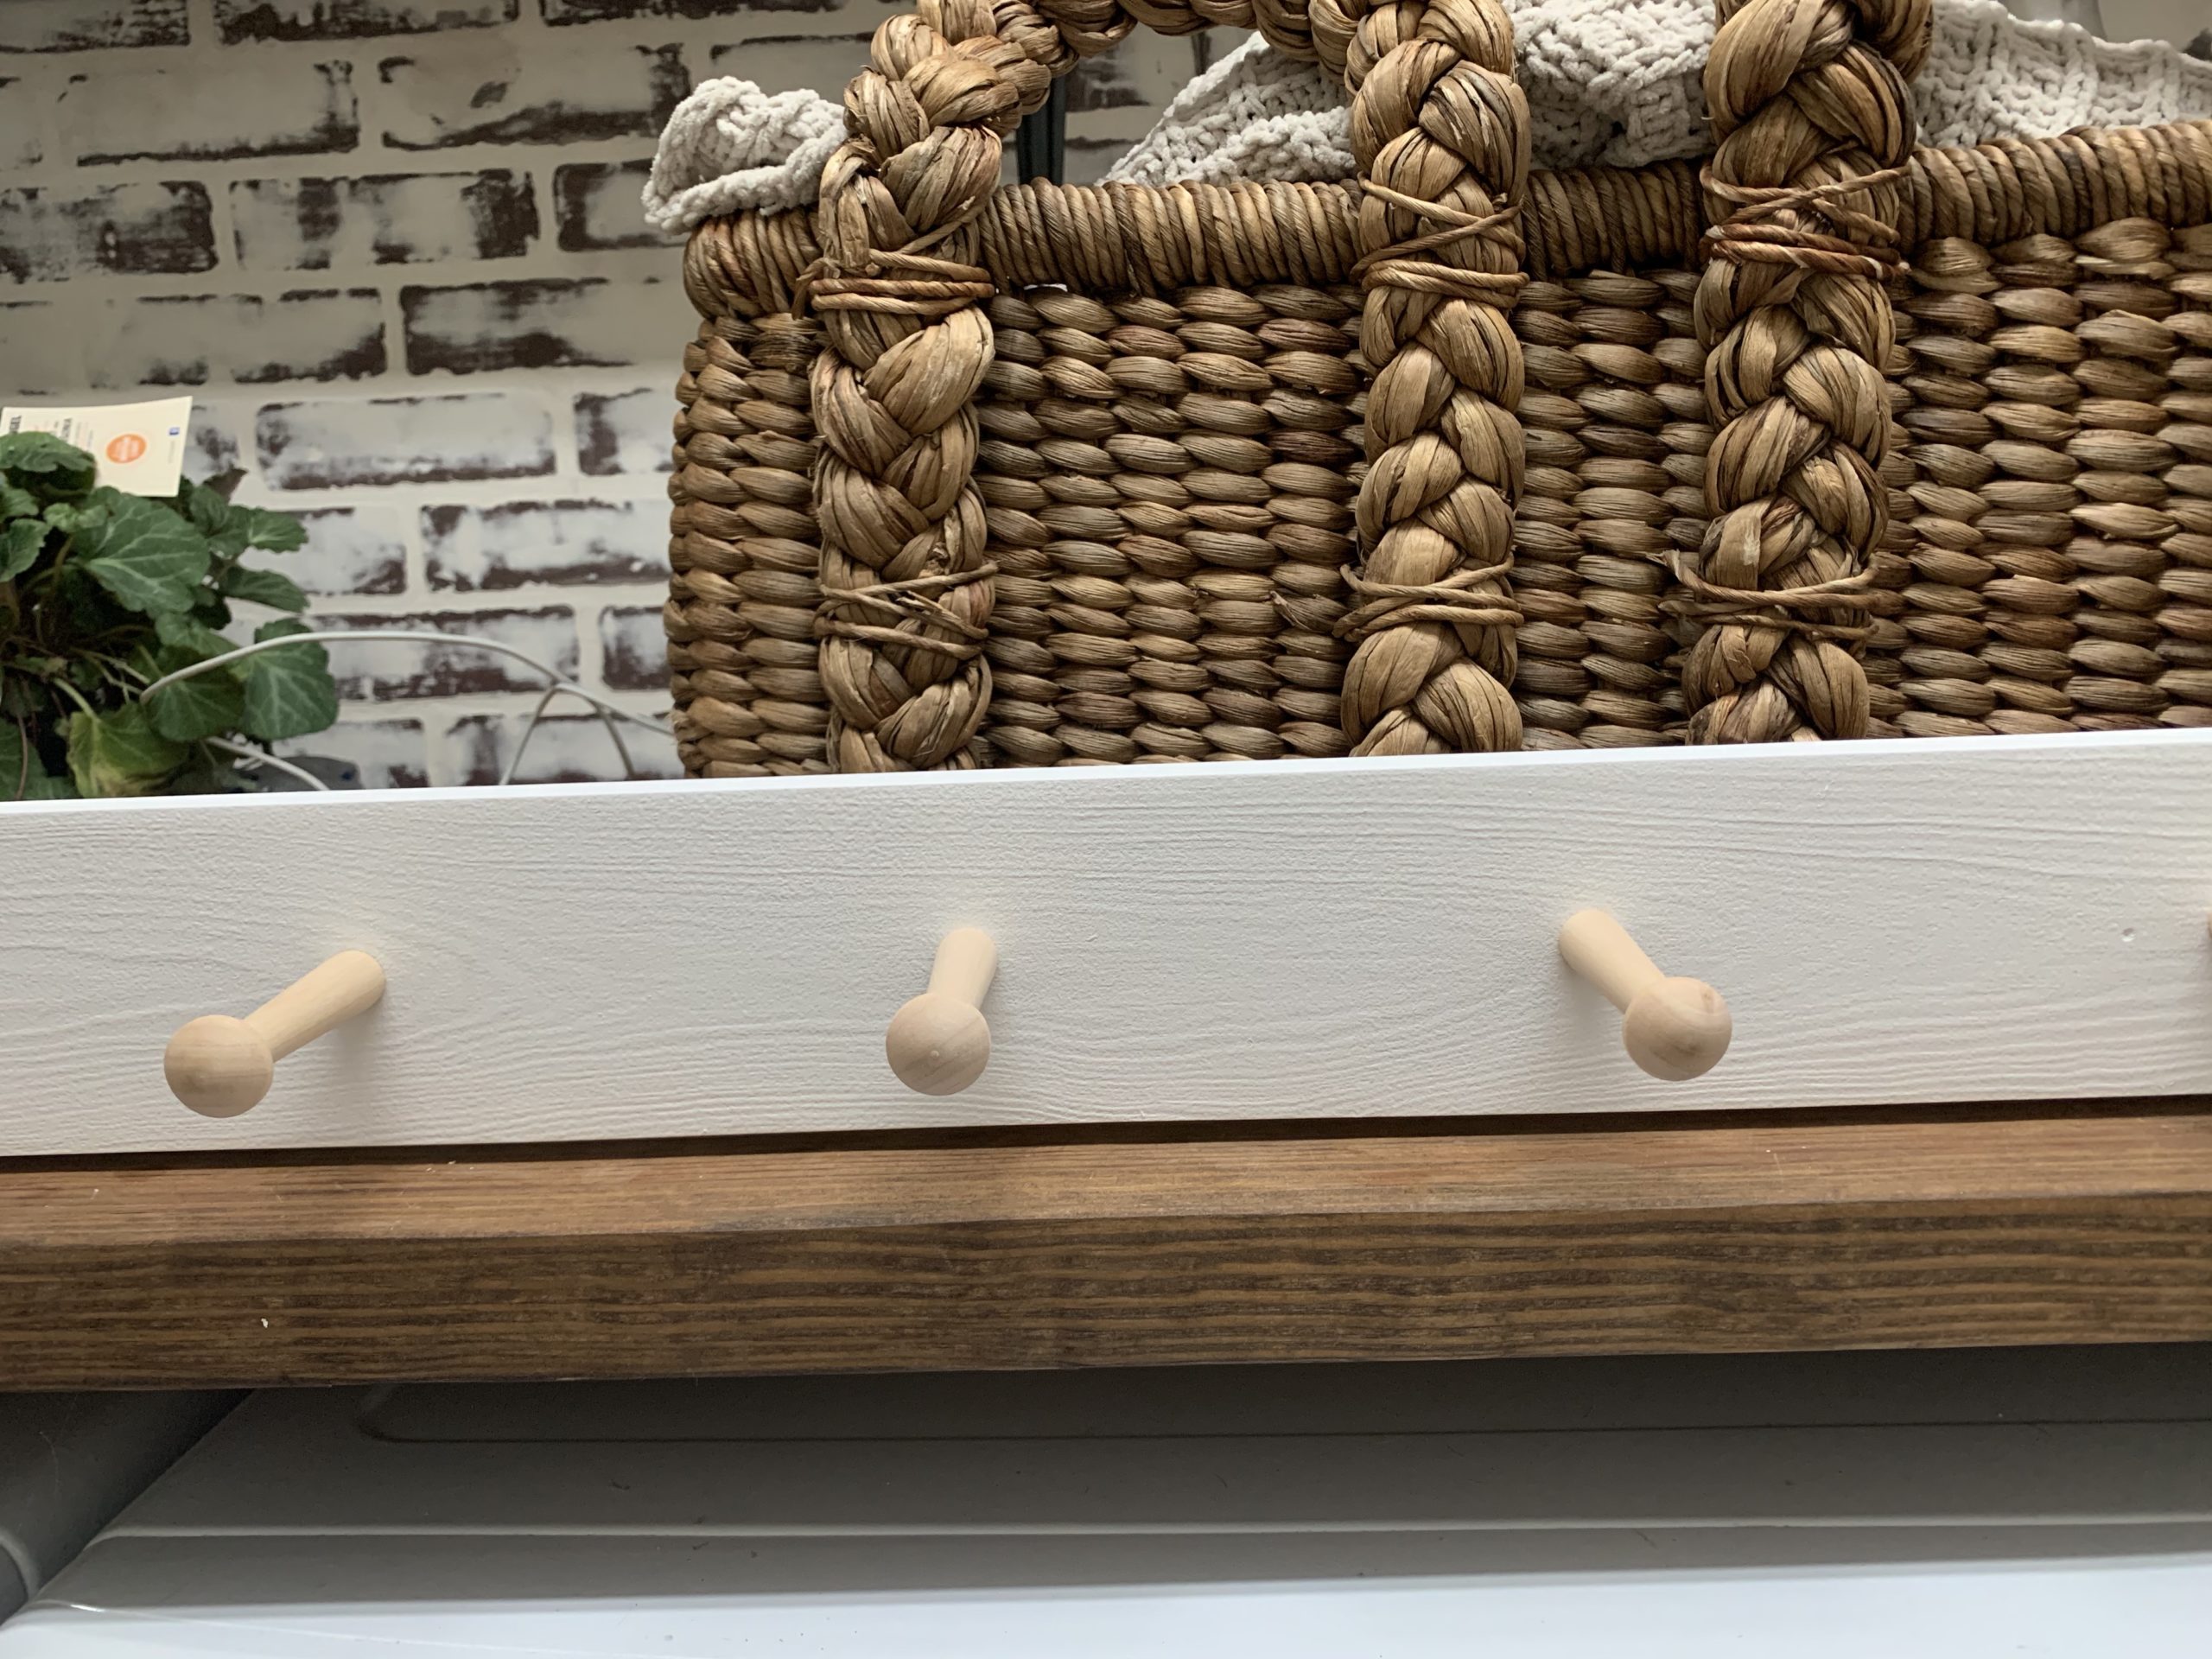
Now let’s talk about what I used to make this. The materials that you need are super easy to get access to and it is only four products. You will need a 1X4X8 board and a 1X3X8 board, a pack of screw in shaker pegs, and white paint. I picked up the white pine boards from Lowe’s Hardware for under $11. I did order the shaker pegs from Amazon because they were cheaper and I got a 25 pack for $33, since I am doing two peg racks. Lastly, you will need white paint. I personally used white chalk paint by Rust-Oleum because it was at my house. You can use any paint that you want.
The first step is to see how long you want to make the shaker peg rack. The one that I made was 94inches long. Once you have the length you want to cut both you 1×4 and you 1X3 to that length. Make sure to save the scrap piece you cut off, you will use it later. When you have the board cut to the length, you need to decide how far apart you want your shaker pegs. I did mine 6 inches apart, which meant that I would need 15 shaker pegs for the length of my board. I started the first peg 2 inches from the end and I put the last one 2 inches from the end of the board. I figured the space between the shaker pegs by subtracting the 4 inches I took off the board by starting and finishing 2 inches from the end of the board on both ends.
Next, I took a tape measure and stretched it across the board and marked a vertical line on the board at every 6 inches. Once that was done, I took the piece that I cut off the board to make it 94inches and cut it in half.t This will make a tool to mark the center of the board on each line. I used this by placing the bottom of the piece you cut in Half on the bottom on the board you are using for the shaker peg rack to make the center of each line (see picture below). When you have all the holes make for where you want to insert your screw in shaker pegs, you will need to use a drill or a drill press to make a hole for the peg. When I pre-drill holes I always do the hole a size smaller than the screw that is being put in the hole. I used a drill press to pre-drill the holes but, if you do not have a drill press you can just use a drill. Make sure that you do not put the hole the way through the board, you only want it about half way through.

After you have pre-drilled all of the peg holes, you will then create a hole on each end for where you will attach the peg rack to the wall. The size of this hole will depend on what size screw you will be using to hang your peg rack. This hole you do want to go and inch from the end of each side of the board and make sure it goes all the way through the board. Once you have done this you will want to take a 120-220 sandpaper and just smooth the surface before you paint it .
Once the boards were ready to paint, I did use chalk paint with a paint roller to paint the boards. It only took about 5 minutes to paint these boards. I let them dry for about 30 minutes and then I flipped them over and painted the other side. The were completely drive in an hour. That is the one thing I love about chalk paint is that it dries extremely fast and makes a project super easy. Once it was dry, I screwed in my shaker pegs into the 1X4 board before I add the 1X3 board/ Now it is time to add the 1X3 board on top of the 1X4 board, to create the shelf.

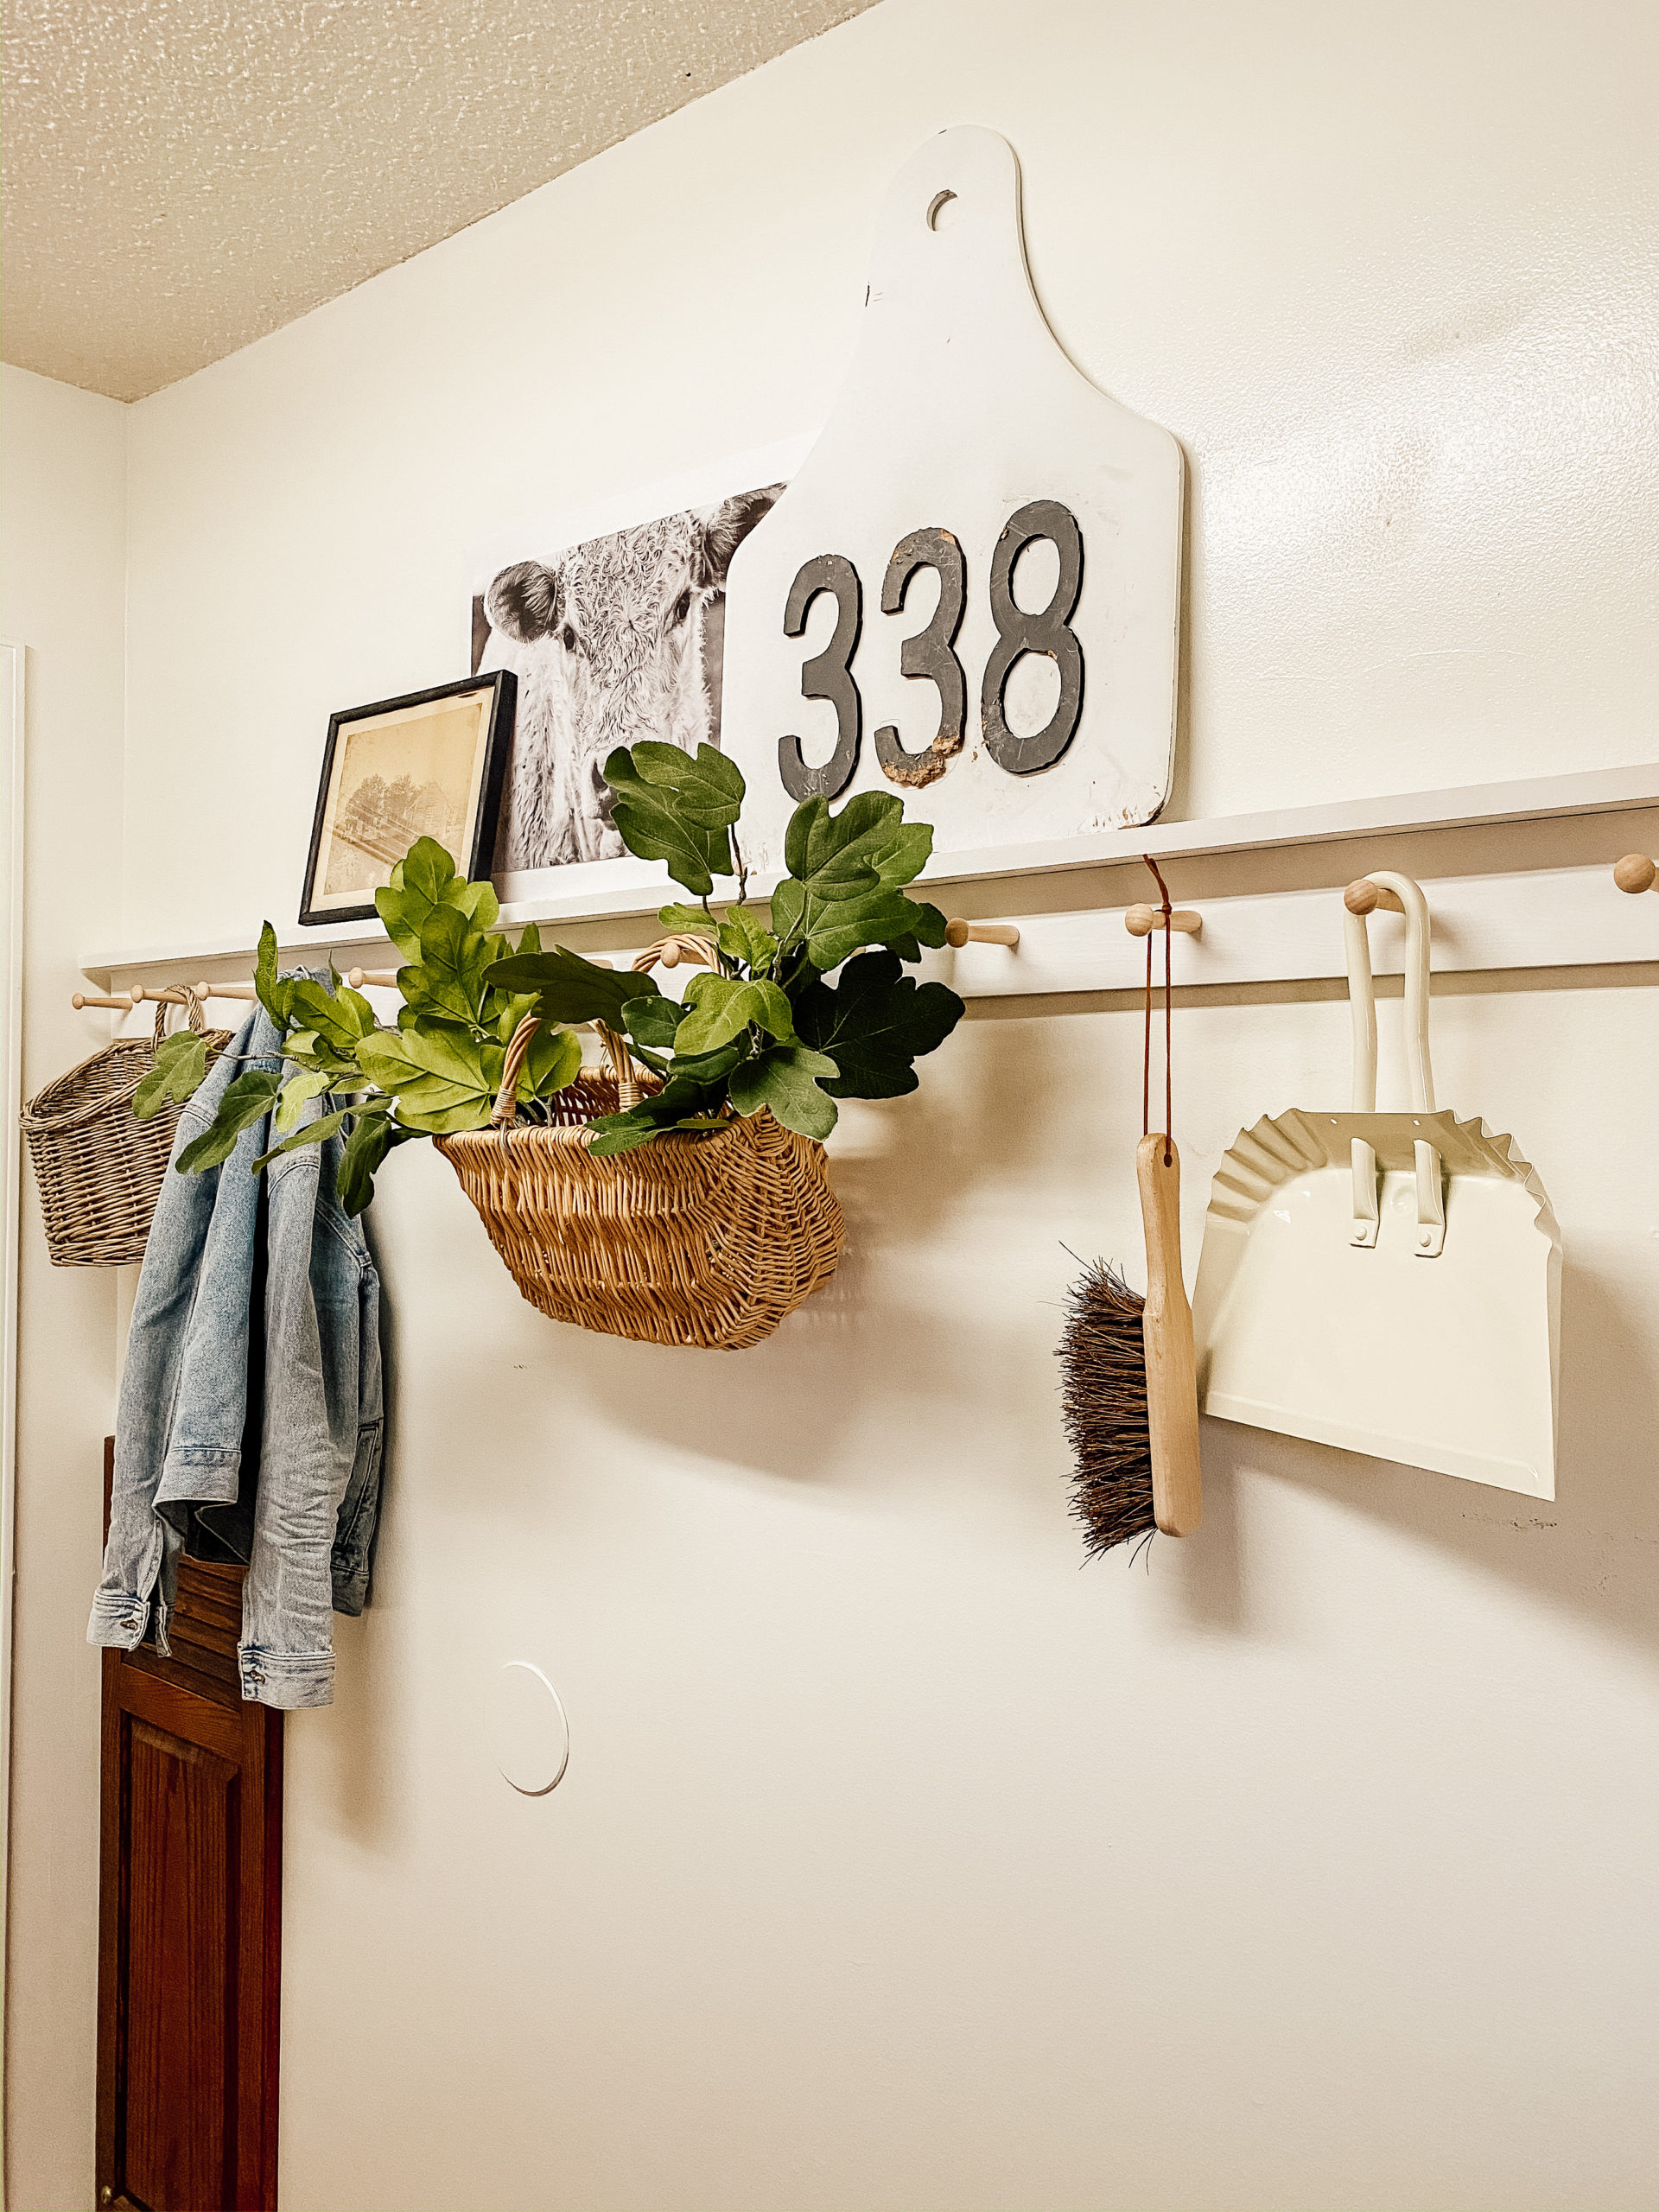
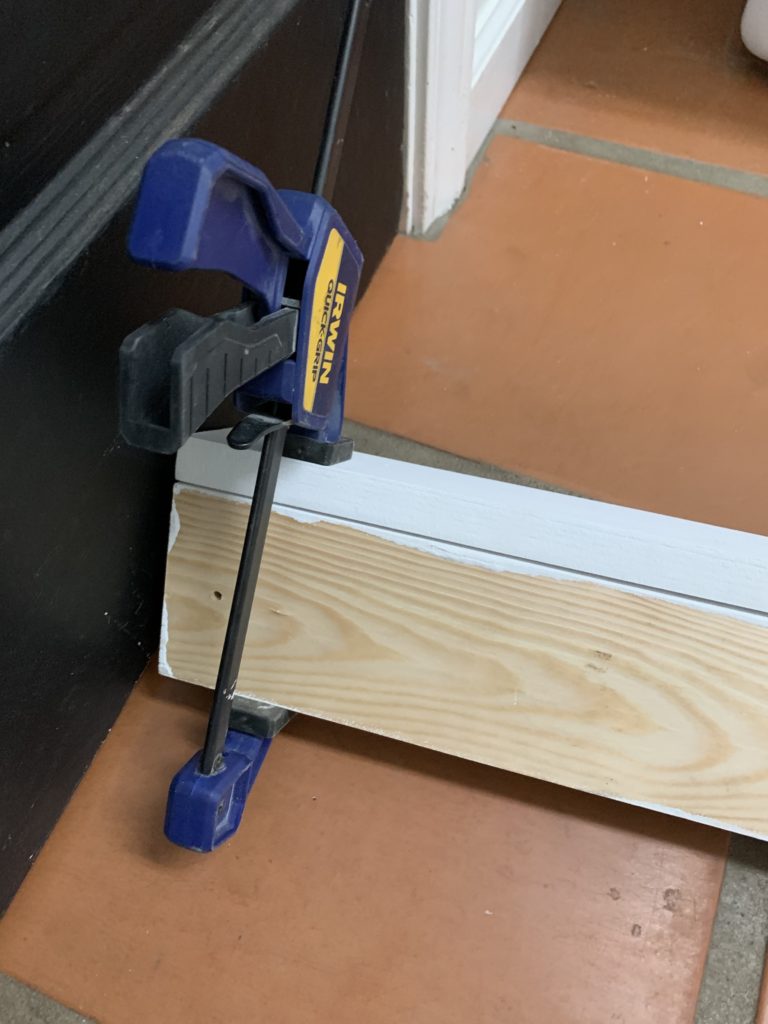
I took the 1X3 and laid it horizontal and put it directly even with the side of the 1X4 ( see picture below), this was to create the shelf. Once I had one end lined up, I used a wood clamp to hold it together while I lined up the other end and clamped it down. When I has both ends of the board clamped down, I took a nail gun and nailed it together. If you do not have a nail gun that is okay, you can just use wood gun. If you are using woof glue you will need to put the glue on and then place the wood clamps and let it dry for a few hours with the clamps still in place to ensure the boards do not move while drying. Once you have you boards together, you’re on your last step , which is to hang it up.
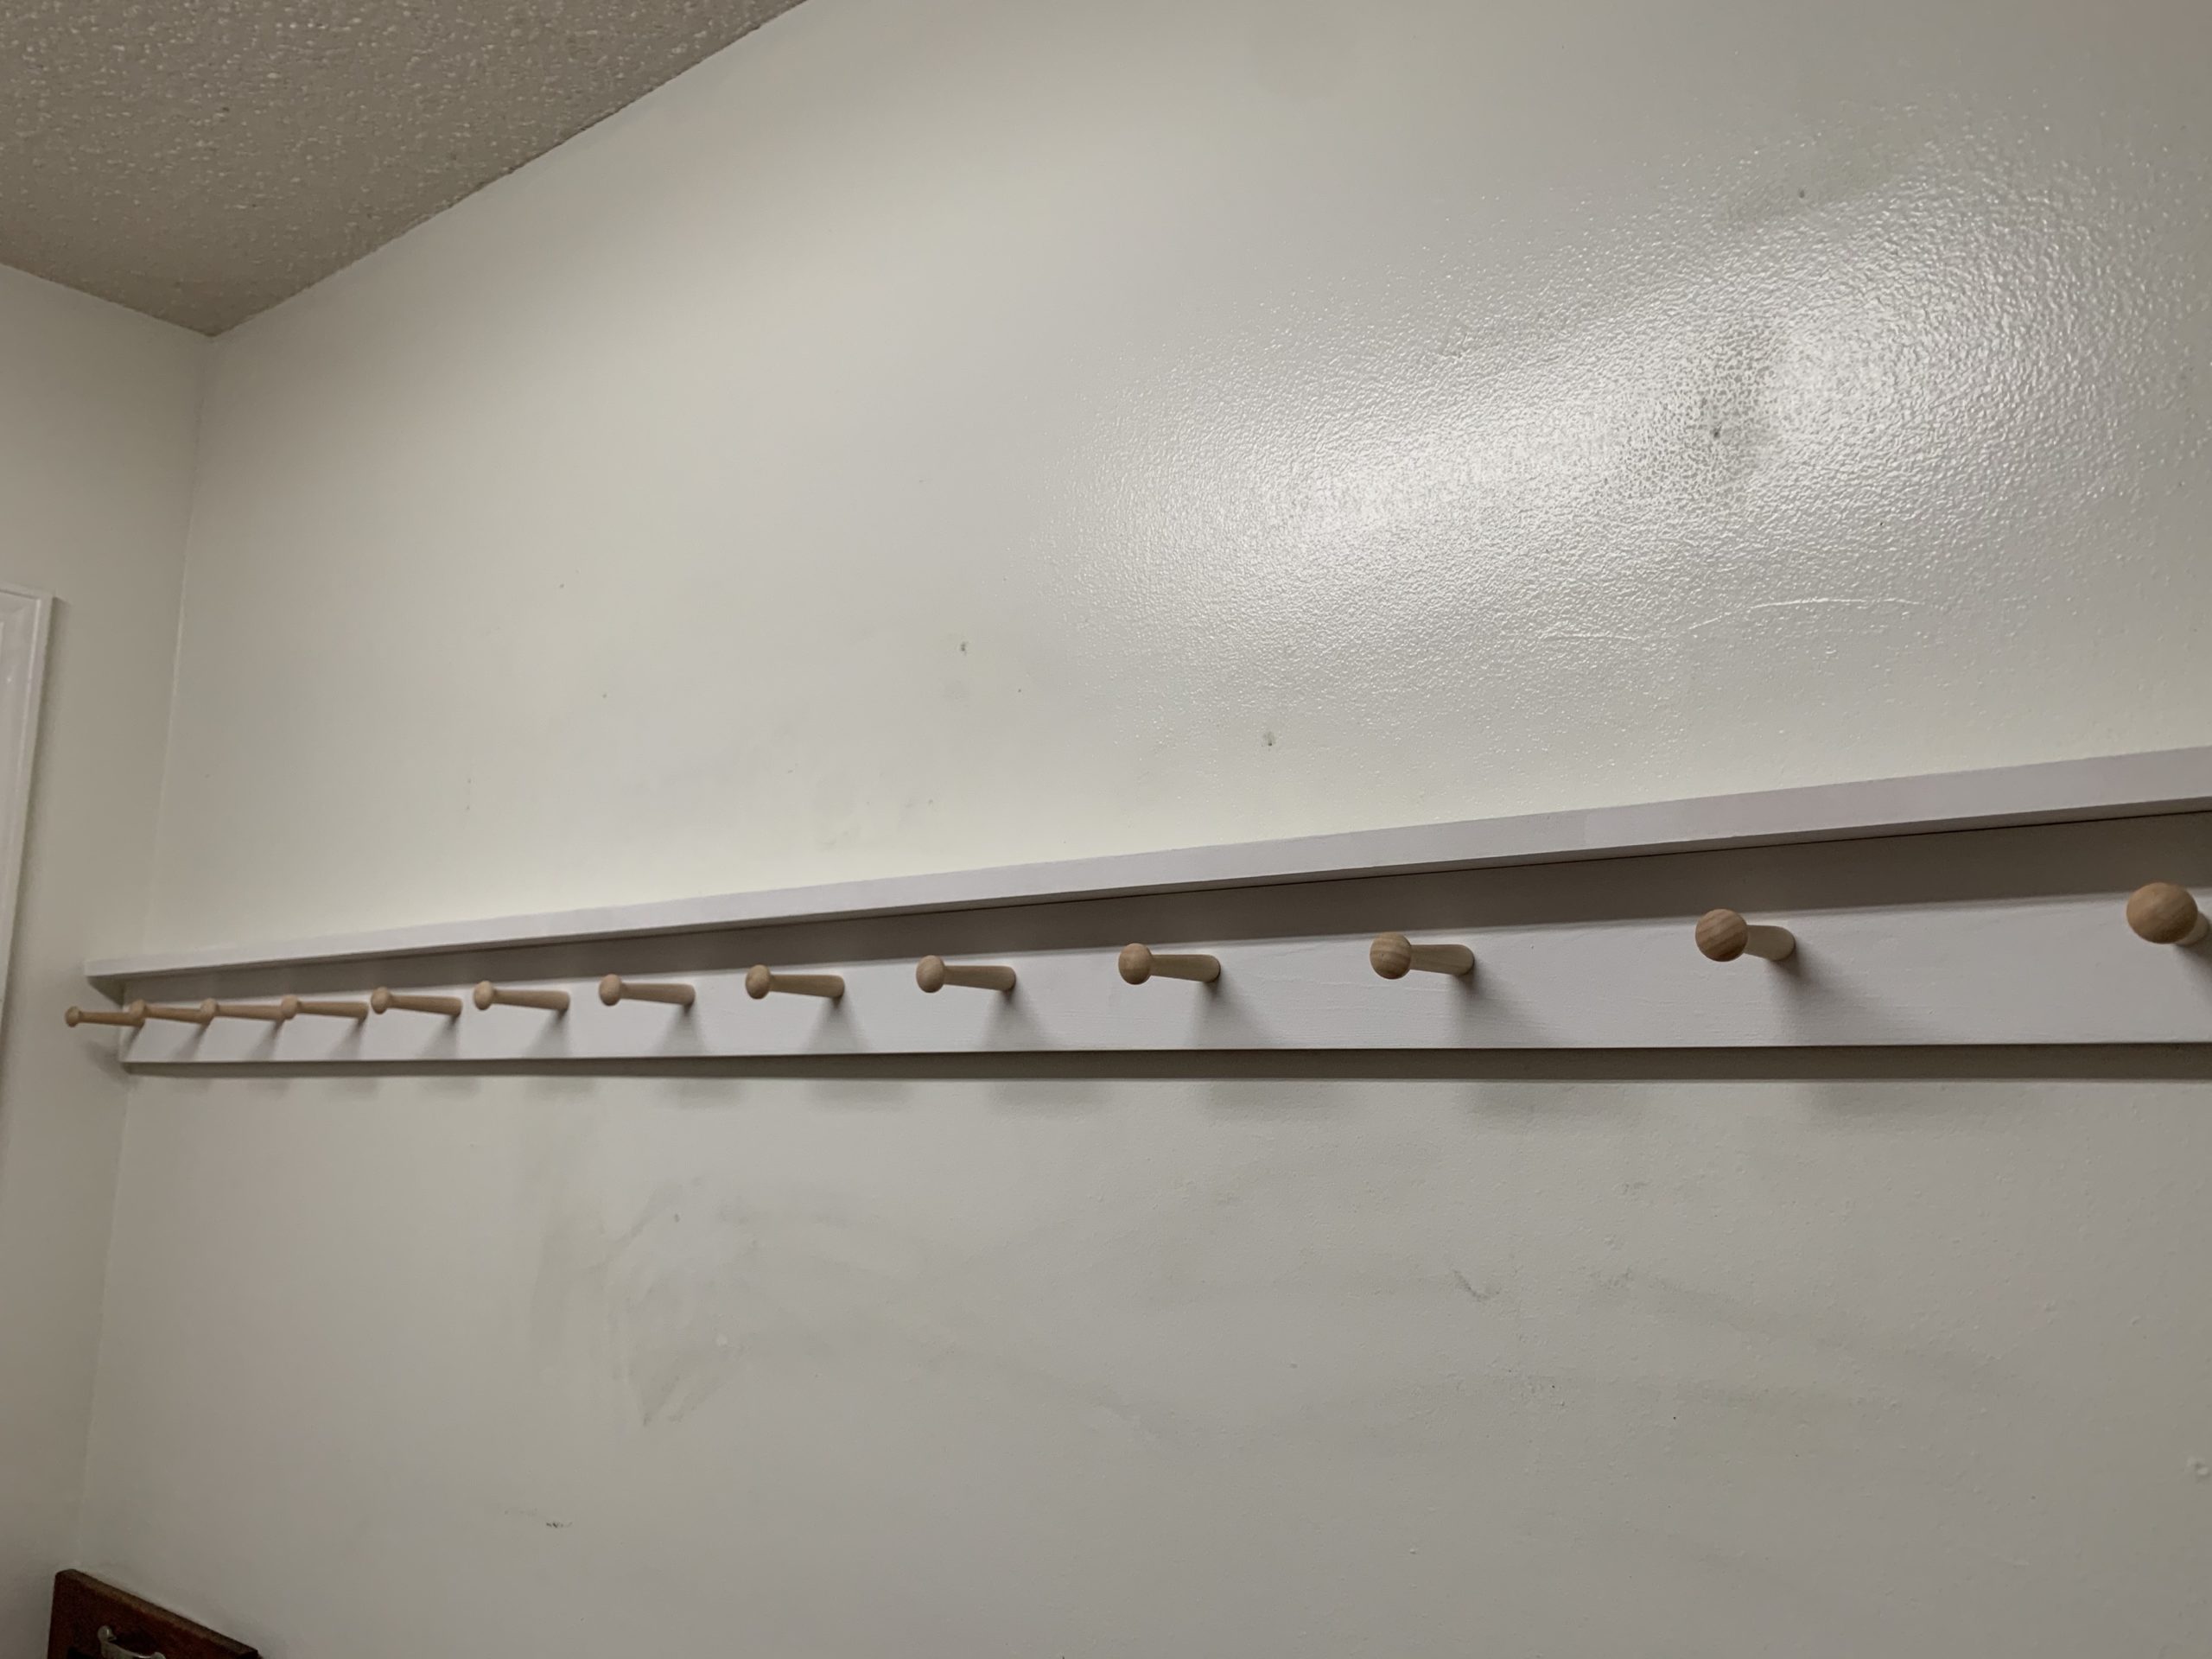
I have to say this is such a great addition to our laundry room since this is the room that we walk through to get in and our of our home because it the room off of the garage. This will be a huge help with the clutter of our cleaning closet and to hold our everyday things we grab while walking out the door. Having fun DIY’s that I can share with you all is something I truly enjoy doing. I hope the you can create this fun project in your home! If you do I would love for your share it with me. Thank you for coming by the blog, XOXO